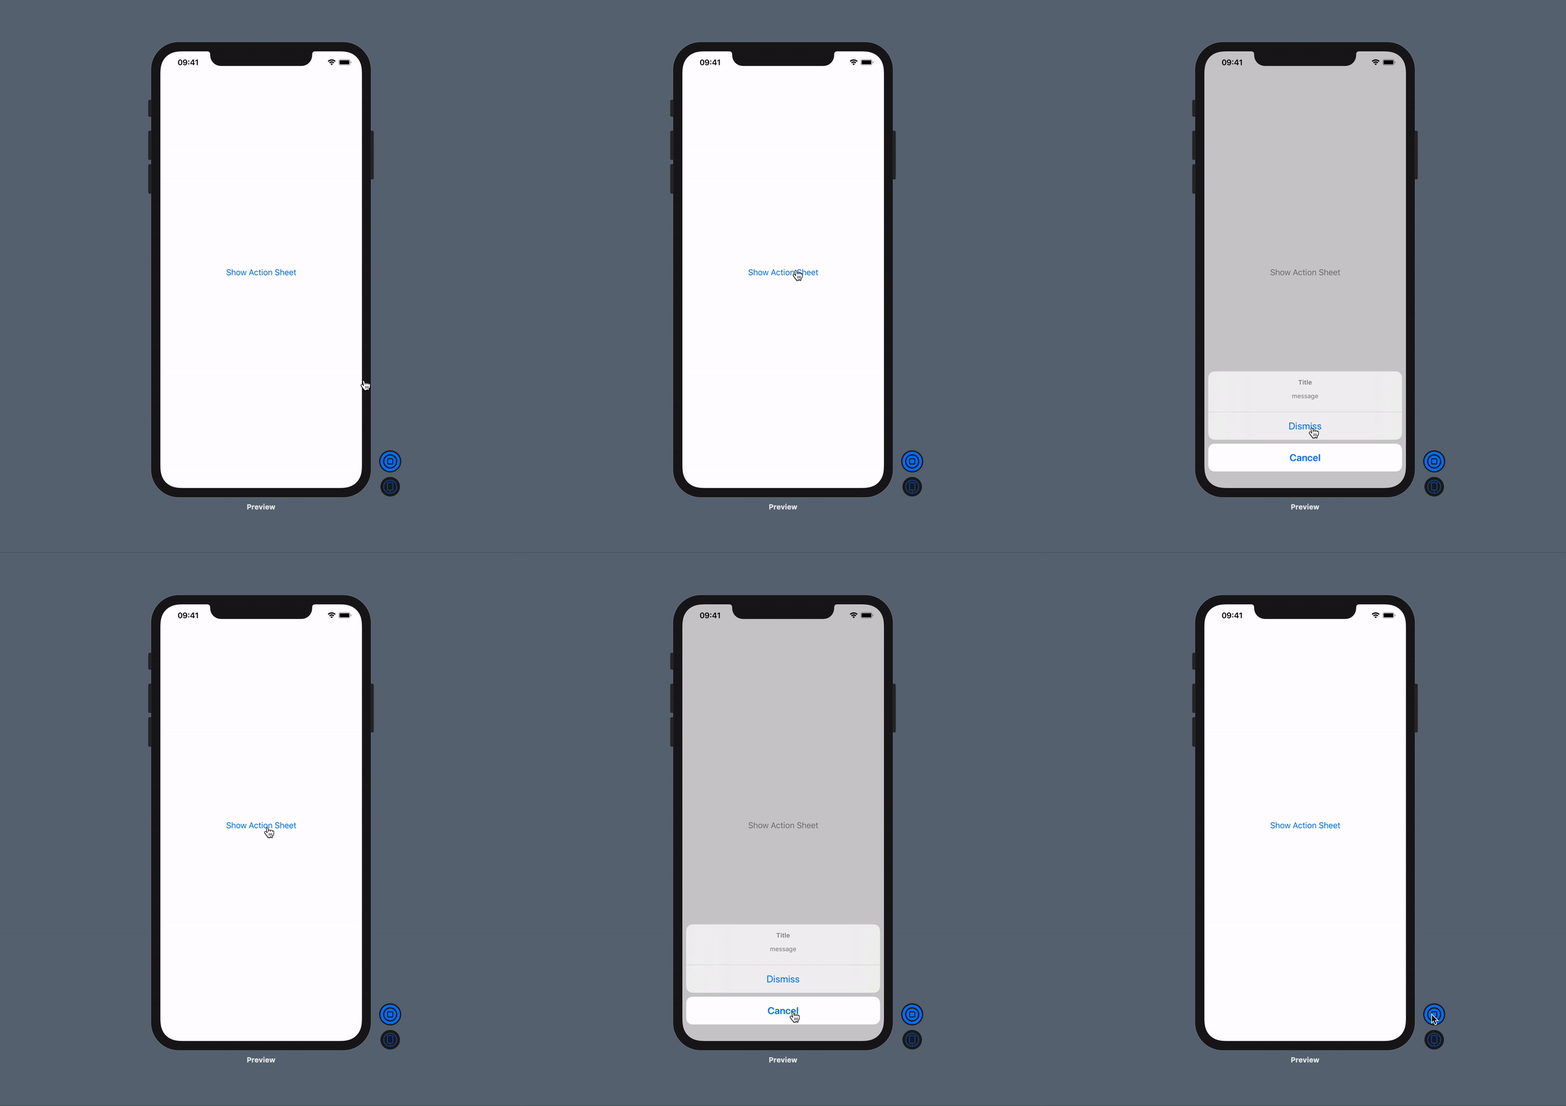
- 이번에는 SwiftUI에서 ActionSheet를 띄우는 방법에 대해 알아보겠습니다.
ActionSheet의 현재
- 아래의 ActionSheet는 deprecated 되었습니다.
- 대신, View 프로토콜의 modifier인
confirmationDialog(...)을 사용해서 ActionSheet을 대체 할 수 있습니다.
@State var showingSheet = false

var body: some View {
    Button(action: {
        self.showingSheet = true
    }) {
        Text("Action Sheet 띄우기")
    }
    .confirmationDialog("타이틀", isPresented: $showingSheet) {
      Button("제거", role: .destructive) {}
      Button("취소", role: .cancel) {}
    }
}
ActionSheet의 과거
- ActionSheet는 과거에 다음과 같은 형태를 갖고 있었습니다.
ActionSheet(title: Text, message: Text?, buttons: [ActionSheet.Button])
- 다음 코드와 같이 버튼과 @State 변수를 만들어, 버튼을 누르면 원하는 ActionSheet가 나오게 할 수 있었습니다.
- 버튼을 누르면, ActionSheet이 활성화되고 옵션 버튼들이 Sheet에 나타나게 됩니다.
- iOS 13과 14를 지원하기 위해서는 여전히 ActionSheet을 이렇게 구현해야 합니다.
@State var showingSheet = false

var body: some View {
    Button(action: {
        self.showingSheet = true
    }) {
        Text("Show Action Sheet")
    }
    .actionSheet(isPresented: $showingSheet) {
        ActionSheet(title: Text("Title"), message: Text("message"), buttons: [.default(Text("Dismiss")), .cancel(Text("Cancel"))])
    }
}

마무리
- 이렇게 해서 SwiftUI에서는 ActionSheet을 어떻게 띄우는지 알아봤습니다.

